Bathrooms are collectors of pathogens, including bacteria, mould, mildew, and viruses.
While some of these may not be harmful, many are, and in the interest of health and happiness, every attempt should be made to eliminate these odour-causing contaminants and keep your bathroom as clean and fresh as possible.
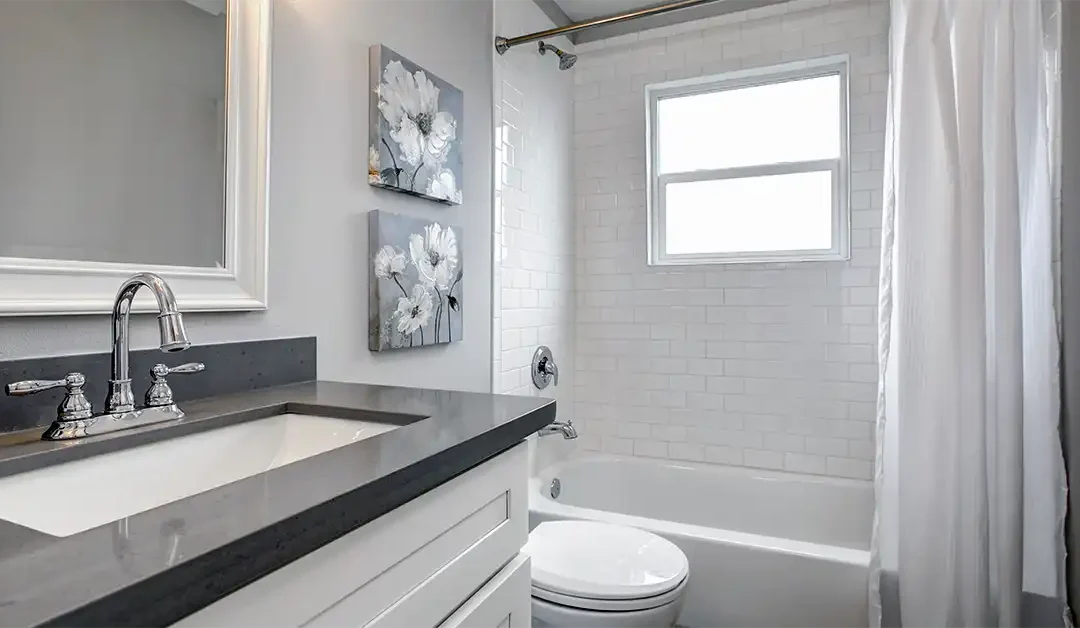
Bathroom Cleaning Strategy
The general strategy for keeping a bathroom clean is to clean it as often and efficiently as possible. In the mornings, after everyone has used it and left for school or work, is a good time if someone is home to do it. If your bathroom is busy in the evenings or on weekends, or you have guests over for a party or otherwise, it’s a good idea to make regular checkups in the bathroom.
The strategy here is to clean the most commonly contaminated areas frequently and, occasionally, do a more thorough cleaning to sanitize and refresh completely.
In this article, we’ll first cover the primary areas of contamination and how to perform a general cleanup daily. This is similar to how public restrooms are kept clean, more frequently and more efficiently.
We’ll then get into the details of a more thorough cleaning to sanitize and refresh the bathroom totally.
Let’s get started!
Regular Bathroom Cleaning
Bathrooms should be serviced daily. Garbage fills quickly; wastepaper, soap, and towels are disposable and need refilling. A quick wipe-down and possible floor sweeping are generally enough for daily bathroom care.
Be aware, though, that bathrooms are especially susceptible to contamination from germs and showers from soap scum.
The Nature of Bathroom Contamination
Some pathogens travel by air or water, but the primary contaminants (germs) mostly travel by touch in bathrooms. A good disinfecting bathroom cleaner makes doing a great job quick and easy. Areas of special concern should be touch points including:
- door and cabinet handles
- light switches
- soap dispenser or dish
- towel rack
- toilet roll dispenser
- waste bin lid
- flush button
- toilets: bowl, seat, lid
- toilet brushes
These are the primary areas of contamination in bathrooms and the ones to concentrate on with your disinfecting bathroom cleaner and a rag. All countertops generally need to be tidied and wiped down with a soapy rag. Mirrors can be cleaned as necessary.
Soap Scum
If you are lucky enough to have a shower, you should be well aware of soap scum. We keep a squeegee in the bathroom for doing the tiles and shower doors after showers, but there is just no way around soap scum in the bathroom, and removing it can be a challenge.
Scrubbing Bubbles (by scJohnson) gets our vote for the best bathroom tile and shower door cleaner. We can spray it on and while it emulsifies the soap scum. clean the rest of the bathroom, then return to it to rinse it. The bubbles also do an excellent job around toilets and taps, an all-around excellent bathroom cleaner and a great time saver.
Deep Cleaning Bathrooms
Compared to kitchens, deep cleaning bathrooms is easy. The instructions below detail the general workflow of a bathroom deep cleaning. This is the same procedure used for a move-in or move-out cleaning.
If you have better things to do on your days off, this is a great time to call a cleaning service like Pink’nClean. They bring their own equipment and specialty cleaners. They are very efficient and leave no mess to clean when done. All at a very reasonable price.
The Right Stuff – Choosing Your Cleaners
Note: Natural ingredients are not necessarily safer than synthetic chemicals. Natural ingredients may be allergens, and under regulations, fragrance ingredients don’t need to be disclosed, even though some can be irritants.
- Disinfecting Cleaner: Our favourite general purpose disinfecting bathroom cleaner is Pine-Sol (Original Pine Scent), the only one of their scented cleaners that is actually a disinfectant and will eliminate 99.9% of germs. The suggested mixing is 1/4 cup Pine-Sol per gallon of water. Be careful on floors though, Pine-Sol may actually remove the finish on some floors.
- Soap Scum Remover: The quickest and most effective way to eliminate soap scum on tiles, walls, and shower doors. Our favourite is scJohnson‘s Scrubbing Bubbles; we have tried many others but found none more effective.
- Disinfecting Spray: For hard-to-reach areas or areas where you want residual disinfecting action, nothing beats a good spray disinfectant. Clorox or Lysol – they are both great products and work well. Our cleaners have their favourites, but they all carry disinfecting sprays.
- Vinegar: For descaling the shower head by breaking down the calcium buildup. It needs to soak for about an hour, so if your shower head is fixed, you will also need a plastic freezer bag and a rubber band to immerse the shower head.
- Bleach: Kills germs and whitens. It is best used for cleaning grout and general sanitizing.
- Toilet Brush: Every home should have one, but to be sure, you will need a good toilet brush to clean the bowl thoroughly. And be sure to clean the brush well afterward.
Apart from your cleaners, you will need a pail, rags or sponges, and rubber gloves (mandatory for bathroom cleaning), and 1-2 hours of time. The specifics of oven and floor cleaning are covered in other posts, here we focus on the overall kitchen cleaning process.
Bathroom Deep Cleaning Workflow
If you use the right cleaners, bathroom deep cleaning can be mostly standing and wiping time with very little working time. I mentioned 1-2 hours above as the total time it takes to go from dirty bathroom to clean bathroom. In many cases, while the cleaners are working, you could be doing other work or even relaxing. Here is the general workflow.
- Linen: This includes bath towels, face towels, and face cloths; apart from the ones prepared for immediate use, clean bathroom linen should not be stored in the bathroom. Depending on how long the linen has been in the bathroom, it too can be contaminated, especially if it has been used. While the linen is running through the laundry, we can continue.
- Rugs, Toilet Seat Covers: If you have a rug in the bathroom or a decorative toilet seat cover, these are almost certainly contaminated. The toilet seat cover can be run through the laundry, but the rug may need to be taken outside, washed with a hose in some disinfectant cleaner like Pine-Sol, and then hung to dry. While washing and drying goes on, we continue.
- Shower Curtains and Caddies: These pick up soap scum and must be cleaned. The caddies can be scrubbed in a sink with water and Pine-Sol, and the shower curtains (even plastic) can be washed as a regular load of laundry along with a couple of towels to aid in scrubbing using regular laundry detergent. While the curtains are being washed, we can continue with the caddies and the rest of the bathroom.
- Shower Walls (tiles) and Doors: These will most likely be soiled with soap scum which can be very hard to remove. For this reason, we use the Scrubbing Bubbles and spray it on everywhere containing soap scum. This needs to sit anywhere from 20 minutes to an hour, but we’ll continue cleaning while it works. It may need respraying occasionally or even an intermediary wipe down and respray to remove all soap scum.
If the grout looks bad, some bleach may be brushed into it for extra germ-killing action and brightening it. - Shower Fixture: These suffer from calcium buildup, which can eventually get to the stage that is blocking the pores in the shower head and restricting flow. They also attract germs, so with buildup, when you turn on the shower, you release these germs into the air. We soak shower heads in vinegar to break down the calcium buildup. In some cases (fixed faucets), we fill a plastic freezer bag with vinegar and hold it on with an elastic band while it soaks. One hour is usually enough to break down the calcium deposits. By this time, your shower or bathtub area should be covered in disinfecting cleaner and soaked.
- Toilets: The outside of the toilets are best cleaned with the Scrubbing Bubbles. Spray it around the outside on the base and around the handle. The toilet roll dispenser can be cleaned in this manner as well. Inside the toilet, add some Pine-Sol and 1/4 cup of bleach, then using the toilet brush, scrub the inside of the bowl well, if the stains are hard to remove, let it sit for a few minutes then continue with the same cleaner mix. When the bowl is clean, the cleaning mix can be simply flushed down the toilet.
- Sinks: Studies show that bathroom sinks are the worst contaminated areas of the bathroom. Germs collect in the drain, and the tap handles are handled even before washing hands, so caution is in order. Mixing water, Pine-Sol, and bleach in the sink and using that is a good way to disinfect the entire sink area. The taps may need a brush to get into the crevices. Once the sink is clean, the cleaning solution can be drained, but letting the solution drain slowly will aid in killing the germs in the drain.
- Exhaust Fan: Bathroom exhaust fans are magnets for germs. If it is easy to remove, you should do so. If it is not, at least spray a healthy amount of disinfectant through it. It would help if you also sprayed the waste basket after washing it to give the disinfectant some residual effect.
- Counters, Cabinets, Shelves: The rest of the bathroom should be wiped down using a pail of 1/4 cup Pine-Sol with one Tbsp of bleach added, paying special attention to the touch areas described earlier. All surfaces should be dried after cleaning.
- Shower Fixture Done: By this time, your shower fixture should be well soaked and most of the calcium broken down. You may need a brush for a final cleaning, but turn on the shower and run hot water through it to release the dissolved calcium. Don’t worry if the shower washes your Scrubbing Bubbles off the walls and door, we’ll be cleaning those next.
- Rinse down Scrubbing Bubbles: By this time your scrubbing action should have done it’s job, you can use the same pail of cleaner (or a fresh pail) to wipe down all the areas previously covered with spray cleaner. Rinsing it well after, will remove all remnants.
- Finishing: The hard work is over. The laundry should be done, the mats dry, and your bathroom should once again look like you just moved in.
Final Finishes
If you look around the edges or base of the tub, base of the toilet, bottom of the cabinets, and areas where water pipes enter and exit the bathroom, you should notice that a silicone seal has been used to seal the edges. If there are gaps or areas where the silicone has broken loose, or is showing signs of age, a fresh coat of silicone can prevent leaks and enhance the appearance greatly. You may need a paint scraper to remove the old sealer before applying the new sealer.